Is There Any Way to Upload a Ceiling Texture Picture to Find Out How to Copy It
Have you ever stuck a decal on a window or a wall? In SketchUp, sticking an image on a face is even easier than those decals, because digital images don't wrinkle or trap air bubbles.
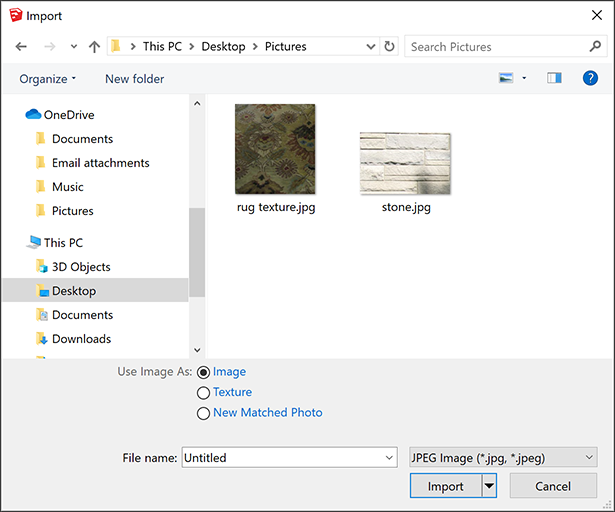
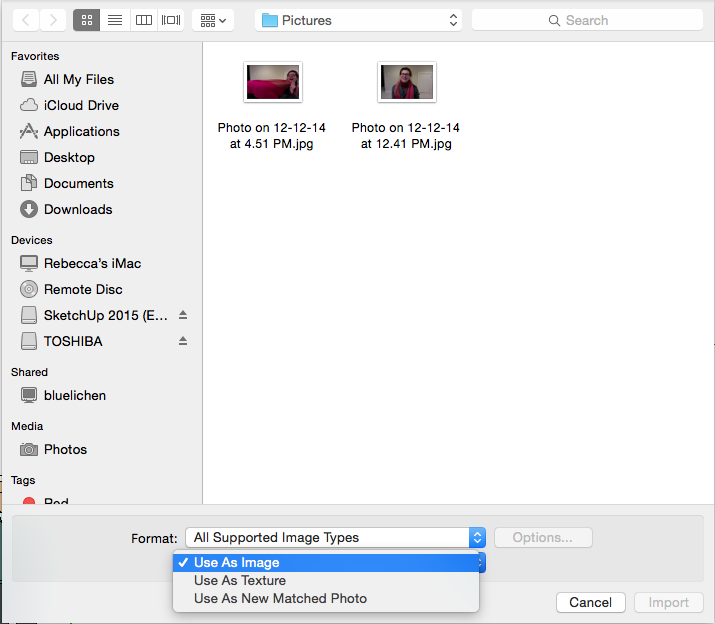
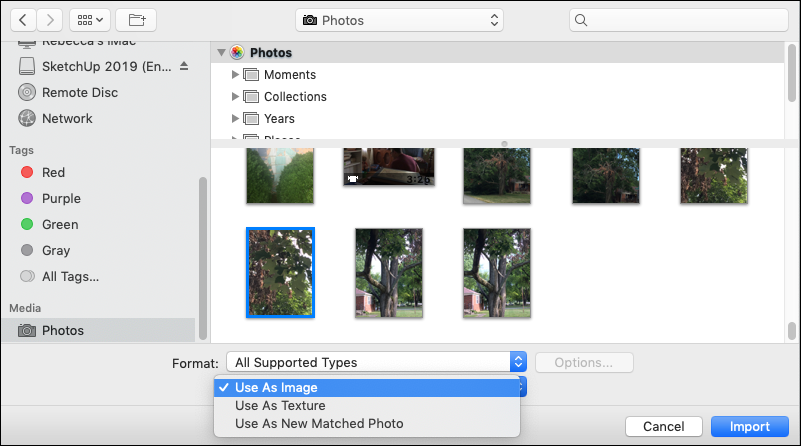
Technically speaking, SketchUp enables you to import images that are already on your difficult bulldoze. When y'all import images from your hard drive (select File > Import to run across the Open dialog box, shown in the figure), yous can import the image as an image, a texture, or a matched photo.
Here's how those options help y'all do dissimilar things with the paradigm in your model:
- Import the image as a bones image, and SketchUp enables y'all to identify the image anywhere in your model. You tin can and then motion, rotate, scale, or stretch the image.
- Import the epitome as a texture, and you can apply the image to an existing face. However, y'all besides gain access to all the materials and Position Texture tools. These tools are introduced in Adding Colors and Textures with Materials, but that article focuses on tiled images. In this article, detect out how to do special techniques with a single epitome, such as wrapping an image around corners, wrapping an image effectually a hidden confront on a cylinder, or projecting an image onto a confront. When you project textures, you tin utilize them to curved surfaces.
- Import the image as a matched photo, and you activate SketchUp's Match Photo tool, which enables yous to lucifer a photo of an existing edifice to a model of that edifice or describe a edifice based on a photograph. Match Photo enables you to apply images to buildings ii faces at time, using the corner of a building or room to apply a 2nd prototype onto a 3D model. Dissimilar images or textures, which work best with rectangular images and faces, Match Photo works well with non-rectangular edifice shapes, such as angled roof lines. Learn all well-nigh Friction match Photo in Matching a Photo to a Model (or a Model to a Photo).
Tip: If your model is spherical, these tools probable won't work well for yous. The one exception is projected textures, which you lot can use to curved (or seemingly curved) surfaces. (For details almost how SketchUp makes apartment faces look smooth, see Softening, Smoothing, and Hiding Geometry.
Tabular array of Contents
- Agreement image basics
- Importing a second image
- Applying a texture to the side of a edifice
- Wrapping textures around boxes and cylinders
- Projecting textures
Agreement image nuts
Digital images come in myriad file types and sizes. SketchUp supports the image file formats outlined in the following tabular array. Some formats may exist more appropriate than others for certain types of images and applications.
| Microsoft Windows and macOS | Microsoft Windows | macOS |
|---|---|---|
| JPEG, PNG, EPS, TIFF | TGA, BMP | PDF, PICT, PSD, SGI |
An image's size is referred to as its resolution. An image's resolution reflects how many pixels the epitome contains. The resolution of an image depends on the image source. Typically, images captured with a digital camera, particularly a dSLR camera, accept very high resolutions, and images downloaded from the spider web have depression resolutions. Yous tin check an prototype'due south resolution in an prototype editing plan, such as Photoshop.
Tip: The higher an paradigm's resolution, the more detail yous see in the epitome. Notwithstanding, a high resolution also makes the image file bigger, which in turn makes your SketchUp model file bigger. Aim for the everyman prototype resolution that still shows the image'south detail clearly in your model. Besides, JPEG and PNG file types use compression algorithms that likewise aid lower an image's file size.
Digital images and SketchUp models are and then various, information technology's hard to give specific recommendations hither. However, here'south an example to illustrate how y'all might find the right resolution and file type for an image. Say your image was captured with a digital camera in a JPEG or JPEG+RAW format. Try saving a copy of your digital image at a resolution of 72 ppi (pixels per inch) and in the JPEG format. If you model dimensions aren't very big, you may desire to reduce the image dimensions likewise (the width and height in pixels). Then, import the image into your SketchUp model and come across how the image looks. If you save a re-create of the original image, you lot can always go dorsum and attempt different settings in your image editor until you lot detect the resolution and dimensions that work well with your SketchUp model.
Importing a 2D image
To import an prototype from your hard bulldoze into a SketchUp model, follow these steps:
- With your model open, select File > Import.
- In the Import dialog box that appears, navigate to the paradigm file on your difficult bulldoze and select information technology. If y'all don't see the image yous're looking for, make sure All Supported Epitome Types is selected from the Files of Type driblet-downwardly listing.
- Select an option for importing your image: Use As Paradigm, Use As Texture, or Use Equally New Matched Photo.
- Click the Import button and your image appears in your model.
Tip: Instead of importing your image, you can drag and driblet supported files into the cartoon surface area. Later on y'all drop the file, the image is imported equally though you selected Use Equally Image in the preceding steps. If you want to import an image equally a texture or matched photograph, use the Import dialog box instead of drag and drop.
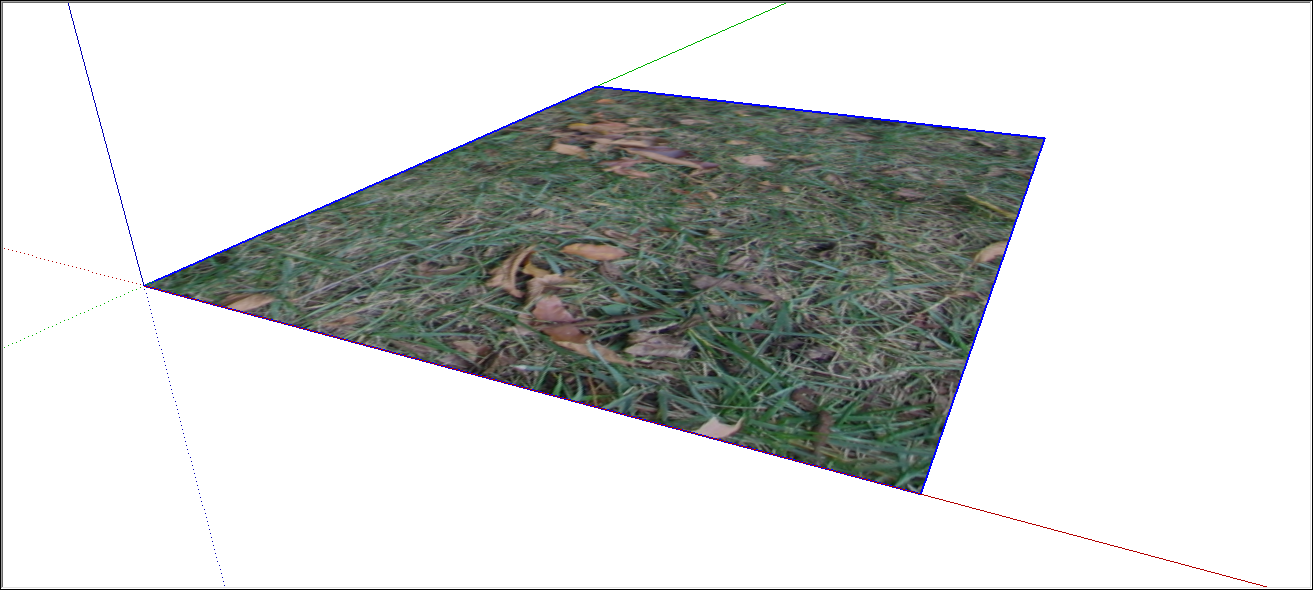
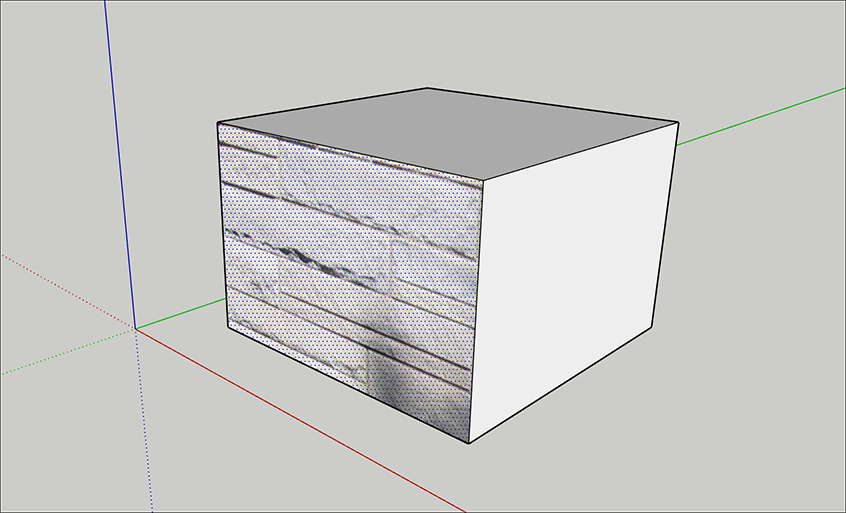
If you selected the Use Every bit Epitome option, your paradigm appears in your model as an paradigm entity with a bitmap image applied to a confront. Here are the basics of working with paradigm entities in your model:
- To place the image entity, click anywhere in your model to place ane corner. Every bit y'all move the cursor, the prototype entity grows or shrinks in size. Click once again to place the opposite corner. SketchUp maintains the paradigm proportions by default; to deconstrain the proportions as you place the file, concur downward the Shift key.
- To movement or rotate the prototype, utilise the Move or Rotate tool.
- To resize the image after yous've placed it, use the Scale tool.
The post-obit figure shows an image placed on a model's ground airplane.
Applying a texture to the side of a edifice
When you apply a photograph as a texture instead of an image, you tin can't place the epitome anywhere in your model. You need to have a confront already fatigued to which you can apply the epitome. However, yous practice have a little more control over the texture'southward positioning on the face.
Tip: Sometimes information technology's useful to subdivide a face up on the side of your building into smaller faces before you apply a photograph texture. This is especially truthful for very long street-facing walls that are difficult to see in a single photograph. Utilise the Line tool to draw edges that subdivide a face.
The following steps walk you through the process of applying a photo texture to flat face and offer a few tips along the way:
- Select File > Import and select the Use Equally Texture selection.
- Click in the lower-left corner of the confront that you want to photo-texture.
- Click in the upper-right corner of the face up to finish applying the prototype.
- (Optional) If yous need to stretch the image or adjust its position, context-click the texture and select Texture > Position from the carte du jour that appears. Then context-click the texture again and articulate Fixed Pins, so that the Position Texture tool is in Free Pin way. You can then drag the white pins to each corner of the face to stretch the image or otherwise apply information technology to the face more precisely. Click exterior the texture when you're done.
Note: For details about the Position Texture tools and Fixed Pins versus Gratis Pivot mode, come across the section on repositioning textures in Calculation Colors and Textures with Materials.
Wrapping textures around boxes and cylinders
After you import an image every bit a texture, you can wrap it around an existing box or cylinder, sort of like wrapping newspaper.
Follow these steps to import an paradigm and wrap it around a box:
- Select File > Import.
- In the Import dialog box, navigate to your image, select information technology, select Utilise As Texture, and click Import.
- Click on the lower-left corner of the face on which you want to offset wrapping your image.
- Then click the upper-right portion of the face. This places your paradigm, as shown in the following figure.
Tip: If you demand to stretch or reposition your image subsequently y'all place information technology, see the section on repositioning textures in the commodity Adding Colors and Textures with Materials.
- Select the Pigment Bucket tool (
 ).
). - Hold downward the Alt key (Microsoft Windows) or the Command key (macOS) to switch to the Eyedropper cursor.
- Click the texture that you applied to the face. The Eyedropper samples your photo.
- Release the modifier key to return to the Pigment Bucket tool, and click an next face or faces in your model to wrap the image around it, as shown in the following figure.

When y'all wrap a material around a cylinder, the steps are the aforementioned. However, because a cylinder is made of several faces that are hidden and smoothed, your epitome may look clipped at first. The post-obit figure shows how the image looks after placing the texture by clicking the bottom edge of the cylinder and and then the meridian edge.

Nonetheless, later you sample the texture with the Eyedropper cursor and click the cylinder with the Paint Saucepan cursor, the whole image wraps around the cylinder, as shown in the next figure.

Projecting textures onto a curved surface
In SketchUp, projected textures are images applied to faces as though a slide projector is projecting the image onto your model. Projected textures enable y'all to apply a texture over a curved surface. This feature is particularly useful for applying a topographic image over a site model, because topography is rarely flat similar the side of a building.
Tip: If your curved surface is a group, open the group'due south context before you follow these steps. Alternately, yous tin can explode the group and so plow your curved surface back into a group afterwards y'all complete the steps. For details about organizing geometry into groups, meet Organizing Your Model.
To projection a texture over a curved surface, follow these steps:
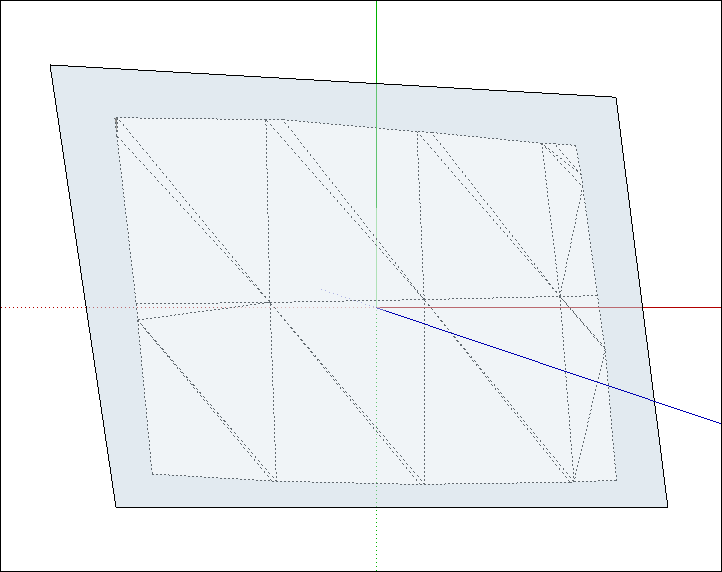
- Draw a unmarried, apartment face that matches the dimensions of your curved surface. The following figure shows a meridian view of a flat surface over a blank terrain.
Tip: Select the flat face and turn on X-Ray way (select View > Manner > X-Ray) and so you lot tin come across the curved surface under the flat surface.
- Import a photo every bit a texture, equally explained in the earlier department Applying a texture to the side of a building. Remember that to see this texture, the Confront settings in the Styles panel must be prepare to Display Shaded Using Textures. (See Creating and Editing a Mode for details most face styles.)
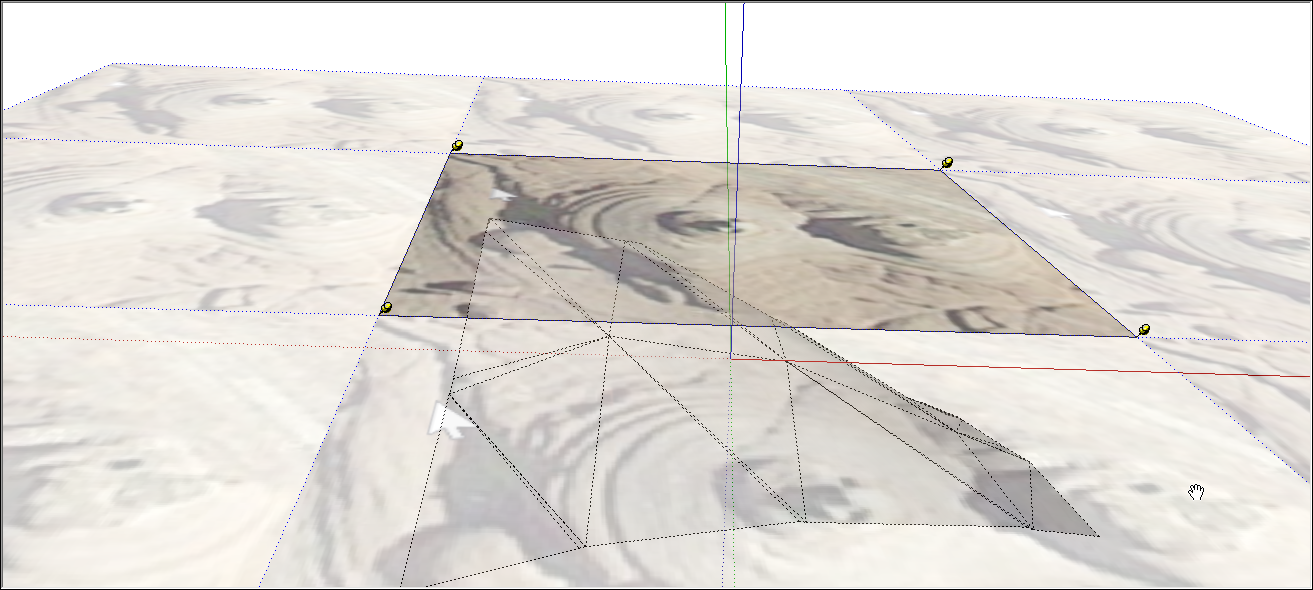
- (Optional) If needed, arrange the position of the texture and so information technology matches your apartment confront. For example, in the following effigy, you see the texture in Free Pin mode after each pin was dragged to a corner of the flat face up. See the section on repositioning textures in Adding Colors and Textures with Materials for details.
- Context-click the texture that y'all applied to the flat face, and from the menu that appears, select Texture > Projected. This pace transforms the texture into a projected texture, then that the remaining steps work.
- With the Select tool (
 ), select all the faces in your curved surface.
 - Select the Paint Bucket tool ().
- Hold downward the Alt primal (Microsoft Windows) or the Command key (macOS), and with the Eyedropper cursor that appears, click the projected texture to sample it. Release the modifier central and so the cursor turns back into the Pigment Bucket.
- With the Pigment Bucket cursor, click the curved surface selection to employ the projected texture to all the faces.
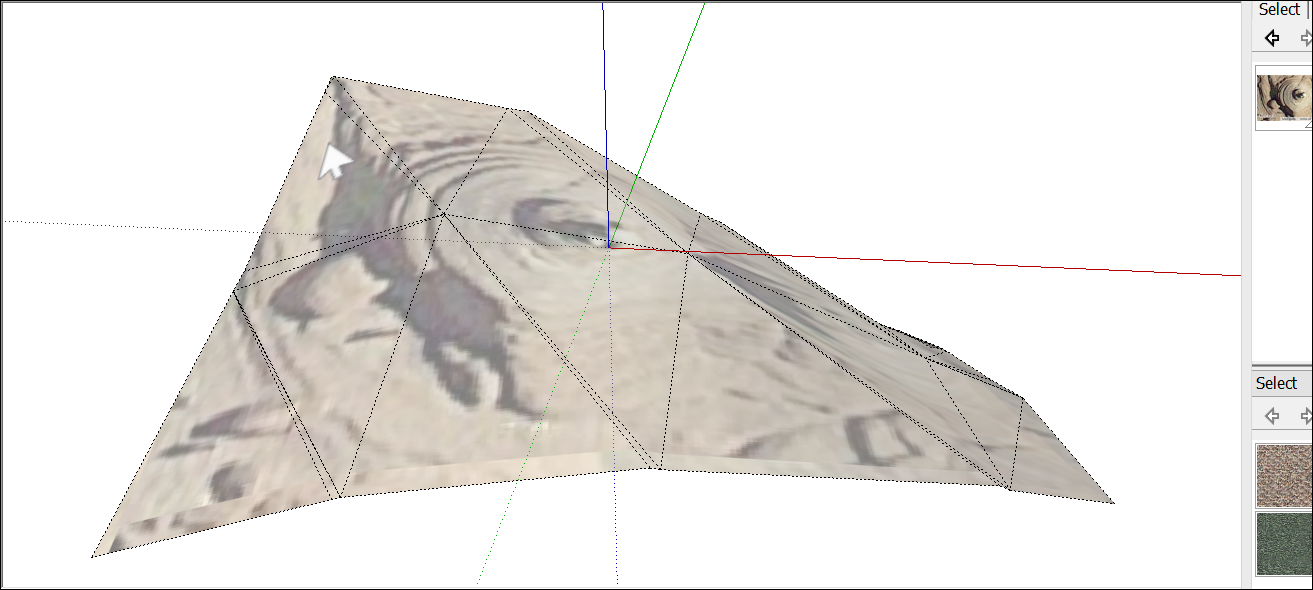
- Delete the flat surface, because you lot no longer demand it. The post-obit effigy shows the projected texture later it's applied the curved surface and the flat surface is deleted.
Source: https://help.sketchup.com/en/sketchup/sticking-photo-or-texture-face
Post a Comment for "Is There Any Way to Upload a Ceiling Texture Picture to Find Out How to Copy It"